This is not a tutorial. This is a highly personal account on how much time, energy, love, trial and error was invested into creating my cosplay of Jareth the Goblin King. If any of you guys have any specific questions on how to make any part of the costume, feel free to drop me a message. I'll be happy to help.
HOW TO MAKE A JARETH
STEP ONE: THE COSTUME
The costume is not as complicated and difficult to make as it may seem, but it's still kinda tricky. As usual, I worked with Shunak - my BFF and partner in crime in all my cosplay adventures. As a master craftsman, Shunak was in charge of armor design, while I worked as his apprentice, providing manual labor, pimping up the details and eventually handling the paint job.
The armor is made of EVA foam - inexpensive, easily accessible and a delight to work with. First, Shunak tailored the armor parts, assembled them and coated them with wood glue for firmness. Then I spray-painted the armor in matte black as the base color, and painstakingly drybrushed it with several shades of bronze and gold acrylics, to give it its trademark "beetle shell" glow. One of the acrylics had glitter in it, because we all know the Goblin King loves to sparkle. Jareth's sigil is made of Fimo polymer clay, and for the relief pattern on the breastplate, Shunak used, believe it or not, plain hot glue.
The collar is of faux leather, held upright by corset wires. It is decorated with chicken bones cast in resin, modeled after actual boiled chicken bones. It took us two attempts to do so, as the first batch of bones got stolen by Shunak's dog (Don't blame the dog. They still smelled like soup.)
The cloak - described in the fandom as "made of rotten velvet" - consists of a cheap black curtain and some tulle, ripped to shreds, sewn in layers onto another piece of cheap curtain, and then weathered by pulling out threads, piercing holes and leaving it outside to gather some dust. (Pro tip: the cheaper the curtain, the more it will look like rotten velvet).
Under the armor, I wore a plain old cotton shirt, with faux leather sleeves sewn onto it. While easy to work with and fairly comfortable to wear, EVA foam will make you sweat buckets, so a cotton undershirt is a must. I used the opportunity to sew the sleeves onto the shirt instead of making them part of the armor, as it makes for a better fit, not to mention the practical advantages.
For the rest of the costume, I used a pair of plain faux leather leggings purchased on sale in H&M, and these silly thigh high boots I bought three years ago in Madrid on a whim, knowing that one day they would serve some purpose.
Oh yes, and there's the sock. The part of the costume that always gets praised the most for "attention to detail". Fun fact: first I simply inserted the sock in my pants, but as I was leaving the apartment, my husband stopped me and meticulously rearranged the thing - up to the point that it almost looked like "sock origami" - because he said it needed to look "more realistic".
STEP TWO: THE WIG
I made the wig myself. First I tried going for one of those "80's rock star" wigs that most of Jareth cosplayers employ, but I wasn't happy with it. It looked cheap: it had that awfully plastic Halloween shine we couldn't get rid of, its color was more yellow than blond, and no matter what I did to it, the hairstyle always ended up resembling Tina Turner more than Jareth.
See?

So I gave up on it and made my own thing. First, I purchased a naturally blond wig in the style best described as "middle aged mom", something like this:

Then, I mercilessly teased the wig until it lost its shape, and finally, I sewed extensions into it.
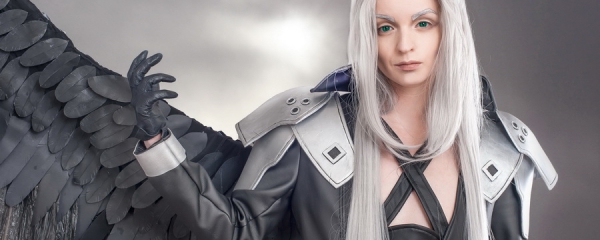
There is one very deliberate inaccuracy concerning the wig. Namely, as you've probably noticed, the hair is quite longer than it should be. I left it like that on purpose, for two reasons.
First, no matter how hard I try, I cannot look like David Bowie. No one can. Because David Bowie was David Bowie. And to quote that tweet I absolutely believe in - I'm not saying that David Bowie was holding the fabric of the universe together, but... *gestures broadly at everything*

Therefore, by giving my Jareth longer hair - which is sometimes seen in fan art - I tried to establish "ownership" over the character and make that step from "cosplaying David Bowie" to "cosplaying Jareth the Goblin King".
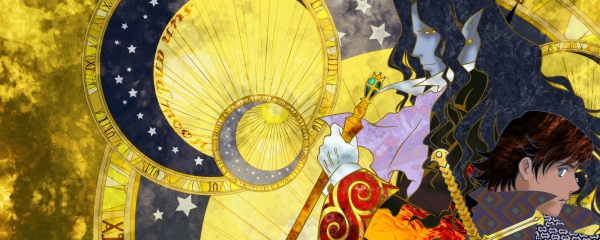
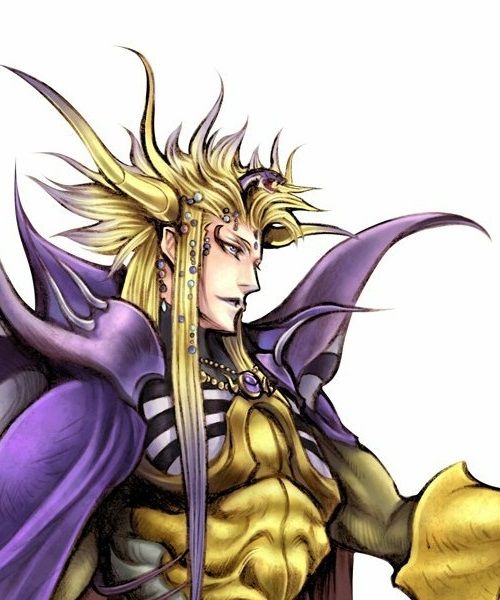
The second reason is paying a small homage to one of my favorite artists, Yoshitaka Amano. Amano was a huge fan of Bowie and his take on the Goblin King. In fact, he was fanboying him so hard that he based the design for one of his best known characters - Emperor Mateus of Final Fantasy - on Jareth. And Mateus has exactly this hairstyle - spiky 80's hair on top, with smooth, longer locks up front.
STEP THREE: THE MAKEUP
Oh boy, that one was a real challenge. Jareth's makeup has to be theatrical and dramatic, glamorous and visible, yet manly and strangely "natural" on his face. That's a whole lot of contradictions to work through.
In my first attempt, I relied on some tutorials I found on YouTube and went with the whole sch-bang of glitter and glow. I used a palette of sparkly grey and black eye shadows, with silver-dust creamy whites for highlights and golden lip gloss to finish the look. It looked nice, VERY nice indeed, but a) it was way too elaborate, b) it made me look girlier, and c) I resembled more the Black Swan than the Goblin King. So once again, I dropped the tutorials and improvised.
I kept the makeup at the minimum:
- black eyeliner and pencil for the eyes. I employed my "anime male makeup" technique, which I use for cosplaying bishounen to make my eyes smaller and narrower - down with the cuteness, hooray for squinting manly slits!
- acrylic paint for the eyebrows. Forget about eye shadows, pencils, eyeliners, brow kits or similar products that can melt or smudge - for cosplay eyebrows, I always use acrylics. The precision is amazing, it stays on the entire day, you can achieve any color you want, and most importantly, it's not toxic for your skin.
- instead of glittery eye shadows, I used a matte palette of natural browns and greys, and focused more on contouring the nose and cheekbones than on painting the eyelids. The trademark black lines from the corner of his eyes are done with eyeliner and three different shades of charcoal grey. I did use some creamy whites for highlights, but only a little, and well blended.
- I completely dropped the lip gloss - while screen accurate, that's the step that made me look too girly. Instead, I again relied on "anime male makeup" and neutralized my lips with a mix of nude lipstick and concealer, accentuated with matte light brown shadow under the bottom lip and in the corners.
STEP FOUR: THE ATTITUDE
Just like his makeup, Jareth is one hot mess of contradictions. He's charming, yet threatening. Seductive, yet cold. Cocky, yet he carries a strong sadness within him, which is particularly palpable in the way he yearns for the girl. He's seemingly invincible, yet strangely vulnerable, and that is something that becomes more and more obvious as the story progresses. So, in my attempt to portray that bundle of contradictions, my principal facial expression was to smile and frown at the same time. It's not an easy expression to maintain, but I hope it does get Jareth's nature across.
STEP FIVE: THE PHOTOS
To complete the project, Shunak took over the post-processing of the studio photos - which were, as all my cosplay pictures, taken by Guru in his Studio Maršal.
In editing the pics, Shunak had two concepts in mind. One was the art of Brian Froud, the famous artist who's known for his work on Celtic mythology (check out the book "Faeries" he co-authored with Alan Lee). Brian Froud was hired by Jim Hanson to design the look of "Labyrinth", and his style oozes from every single frame of the movie. The other source of inspiration was Richard Amsel, the cult 80's poster artist - y'know, the guy who painted all the cool Lucas&Spielberg stuff that marked our childhoods. So by combining these two aesthetics, Shunak wanted to recreate the Faerie mood and the nostalgic 80's appeal. To boot, all the photos are edited in line with the specific scenes in the movie.
Also, I instructed Shunak not to iron out any of my wrinkles in the pictures - on the contrary, even to emphasize them if necessary. Jareth is one of those characters that need a certain level of maturity to pull off properly, and I'm happy to say that in my mid-30's (I'm only two years younger than David Bowie when he played the part), it's an age appropriate cosplay that really makes me feel comfortable in my skin.
So there you have it, that's how I made my Jareth.
To read on WHY I made this cosplay, click here: ferashacosplay.althemy.com/blogpost/2019-how-you-turn-my-world-you-precious-thing-or-on-becoming-jareth
And for more on my cosplay adventures, check out my page: ferashacosplay/
Thank you for your attention, and happy anniversary of our favorite childhood film!
*
Full credits:
Makeup and wig styling by me
Armor by Shunak (pattern, bones, hot glue and EVA foam wizardry) and me (manual labor, details and paint job)
Collar and cape by Ana&Marina of She&She, pimped up by Shunak and me
Photo by Guru, edited by Shunak
Sarah by Csilla, pic used here by Norbert Kis